Accessible Patterns
The Basics Color Contrast Headings Alt Text Document Flow Multiple Formats Word & Google Docs Automatic Checkers Title and Author Headings Tables Lists Columns Adding Alt Text PDFs Reading Order Tags PDF Accessibility Checker Youtube VideosTables
Tables are an excellent tool when making a crochet pattern. When your pattern is clothing you can use a table to show what measurements fit to what size of the pattern
and how much yarn is needed.
When your pattern is able to be scaled up, you can show the yarn and hook sizes needed for each size of the pattern.
It is important to use an actual table when you need one though, you can't just use spaces or the tab button to put information in a way that looks like its in a table
as this is unnavigable for a screen reader.
We do not want to use a table for is for layout unless you are making a Google Doc.
If you want one piece of content next to another there are various other ways to achieve this that doesn't require a table.
This same effect can be done using the column tool, which we'll go over later.
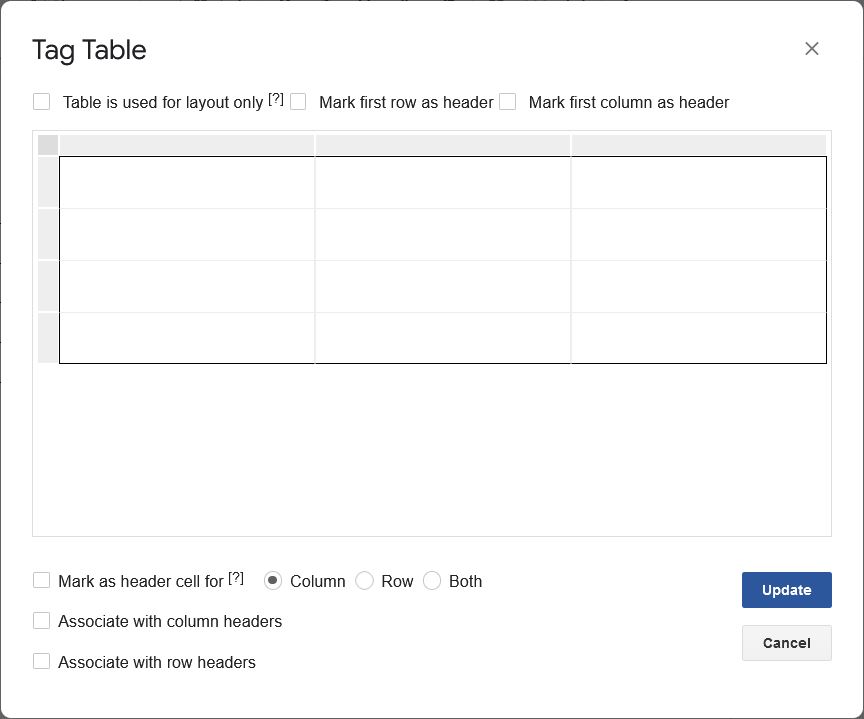
The only exception to this is if you properly tag your table as a layout table in
Google Docs, and then distribute your pattern as a Google Doc. If you plan on making a PDF out of your document, do not make a layout table because
tagging it will be a big hassle.
Avoiding Confusion for Screen Readers
We do not want to use any merged or split cells in a table. This can make navigation with a keyboard or screen reader needlessly difficult.
Put something in every cell. Empty cells are confusing when using a screen reader as often the screen reader will just say nothing when navigating to that cell, leaving the user unsure
if they've navigated to the correct spot.
And finally, you need headers for your table and have them properly marked. Headers are often the first row of table cells, where each column relates to the
first cell of the column. Sometimes, though, your table will have the far left column as the headers. In either case, you need to mark the headings properly so that a
screen reader user will know where they are in a table.
Word
Inserting a Table
To put a real table into a Word document you go to the Insert tab and click on the table icon. From there you can select how many rows and columns are in your table. Dont worry, you can add and subtract columns and rows in the table Layout tab.
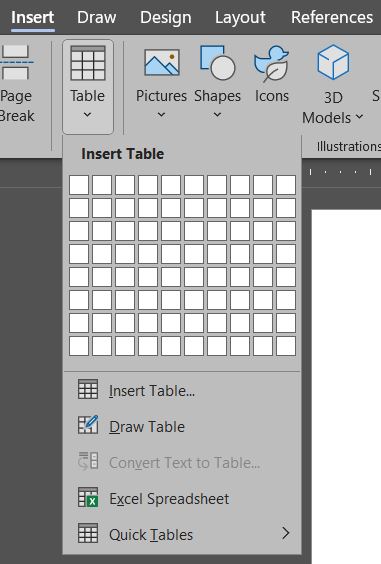
Table Headers
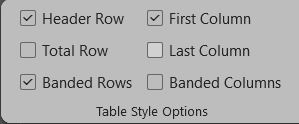
To mark the heading cells of your table you need to go to select your table, then go to the table design tab. You will find in the Table Style Options section a few check boxes with different qualities about the table, and from there you can select the heading row or column of your table.
Google Docs
Inserting a Table
To insert a real table into Google Docs you go to Insert in the ribbon then Table from the drop down menu. From there you can choose from the grid how many rows and columns you want in your table.
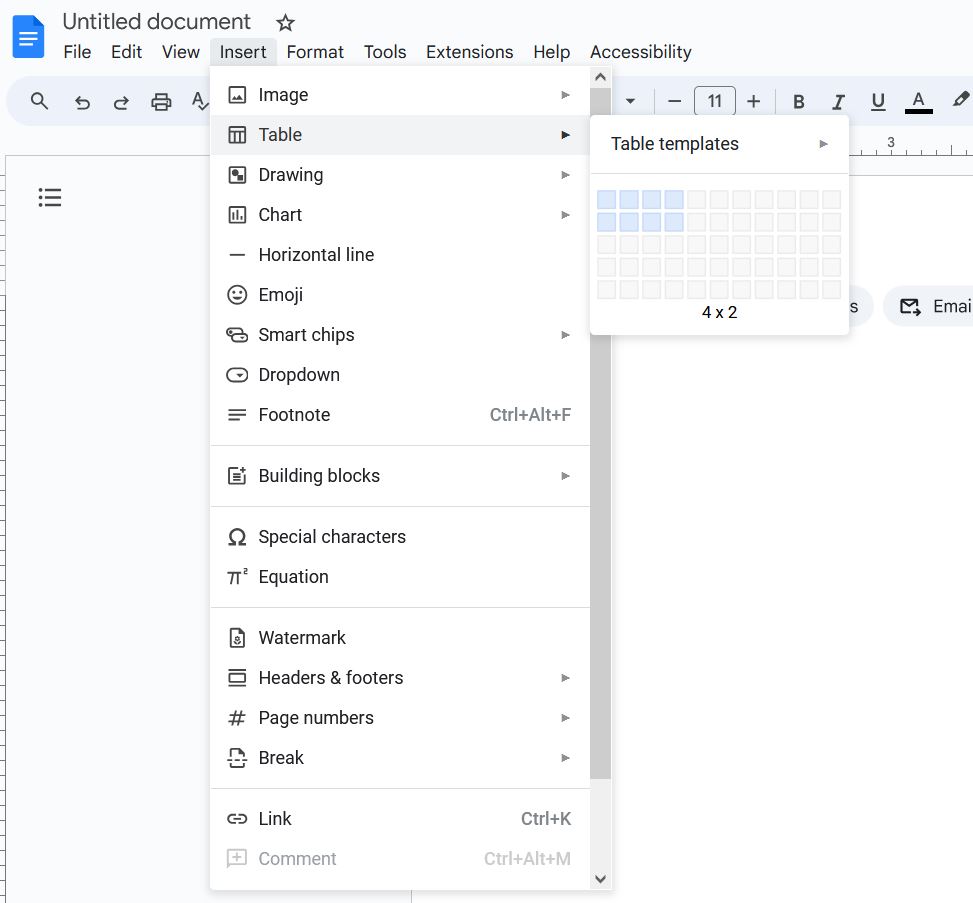
Table Headers
In order to set your table headers in Google Docs you need to have Grackle Docs open. From there Grackle will give a warning that your table needs to be tagged.
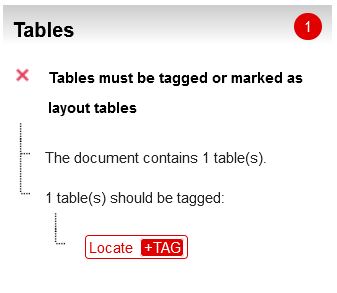
From here click the "Locate and Tag" button. You can then mark your table as a layout table, first row as the header, or the first column as the header. As well you can select the specific cells that are headers if your table is unusual.
